How to Replace a Kitchen Sink Faucet in 10 Easy Steps
A leaky or outdated kitchen faucet can make everyday tasks frustrating, and many people struggle to know where to start with a replacement. You’re not alone—this guide to how to replace a kitchen sink faucet breaks the process into simple steps for a smooth, leak-free upgrade.
To replace your kitchen sink faucet, first gather tools like an adjustable wrench and plumber’s tape. Shut off the water supply and clear the area.
Disconnect water lines and remove the old faucet carefully.
Clean the sink surface, then position and secure the new faucet.
Connect water lines, turn the water back on, and check for leaks.
Test the faucet’s operation and fix any issues.
Follow these steps, and you’ll soon master a smooth, leak-free faucet upgrade.
Key Takeaways
- Turn off water supply and clear the workspace before removing the old faucet to avoid spills and ensure safety.
- Clean the sink surface and properly align the new faucet with sink holes before securing it with mounting nuts.
- Connect compatible hot and cold water supply lines, tightening them hand-tight plus a slight turn for a secure fit.
- Slowly restore the water supply and check all connections for leaks using a dry cloth or tissue to detect moisture.
- Test faucet operation, including water flow, temperature control, and aerator function, adjusting connections if leaks or issues arise.
Gather Tools and Materials for Faucet Replacement
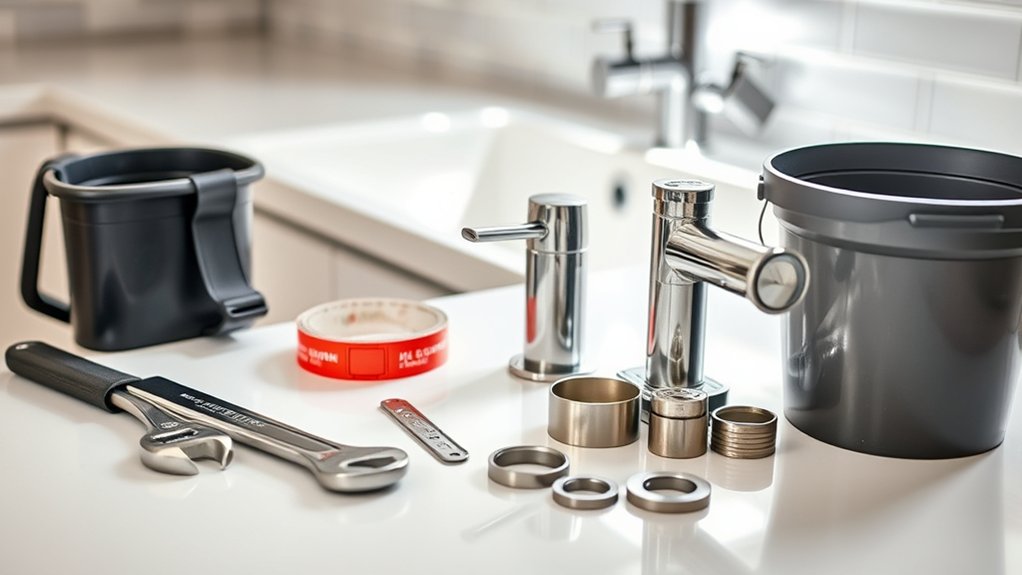
Before you begin replacing your kitchen sink faucet, make sure you’ve gathered all the necessary tools and materials. Start by choosing the right faucet style that fits your kitchen’s design and functionality needs, whether it’s a single-handle, pull-down, or bridge faucet.
Consider material options carefully. Stainless steel and brass are popular for their durability and resistance to corrosion.
Once you’ve selected your new faucet, gather essential tools such as an adjustable wrench, basin wrench, plumber’s tape, and a bucket to catch any water drips. You might also need screwdrivers and a flashlight for better visibility under the sink.
Double-check that you have the correct supply lines compatible with your faucet’s connections. Having everything ready upfront will make the installation smoother and prevent unnecessary interruptions.
Taking time to choose the right faucet style and materials guarantees you get a faucet that not only looks great but lasts longer.
Turn Off the Water Supply and Clear the Area
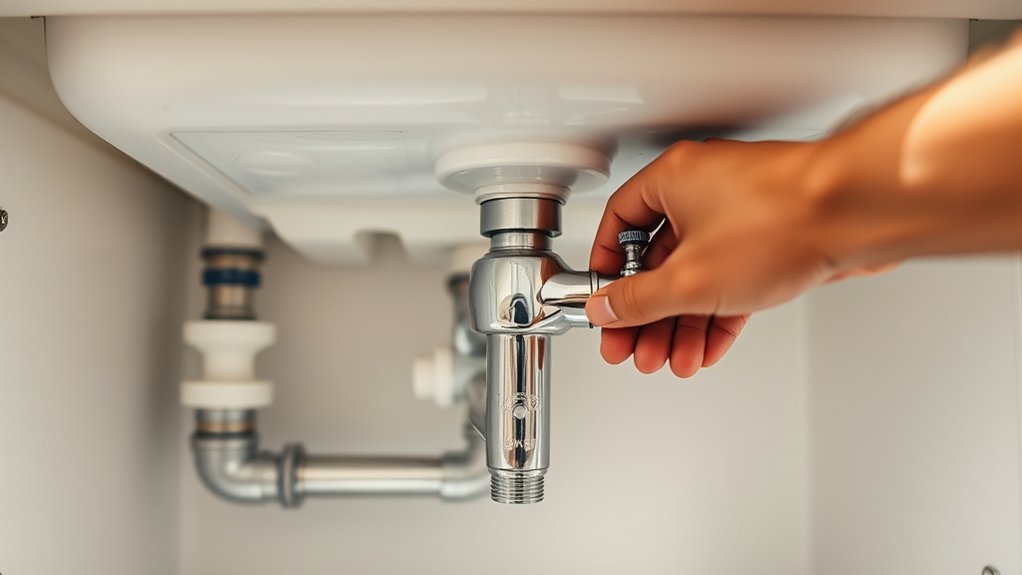
After gathering your tools and selecting the right faucet, the next step is to turn off the water supply to avoid leaks or spills during installation. Locate the shut-off valves under your sink and turn them clockwise until they’re fully closed.
If your sink lacks individual valves, you may need to shut off the main water supply for your home. This step is vital not only to prevent messes but also to support water conservation by avoiding unnecessary waste.
Next, clear the area around your sink to give yourself enough room to work comfortably. Remove any items from under the sink and clear the countertop.
This will help you easily access plumbing connections and reduce the risk of damaging your belongings. Whether you’re installing a modern single-handle faucet or a traditional two-handle style, having a clean, organized workspace sets you up for a smoother, safer faucet replacement.
Disconnect Water Lines From the Old Faucet
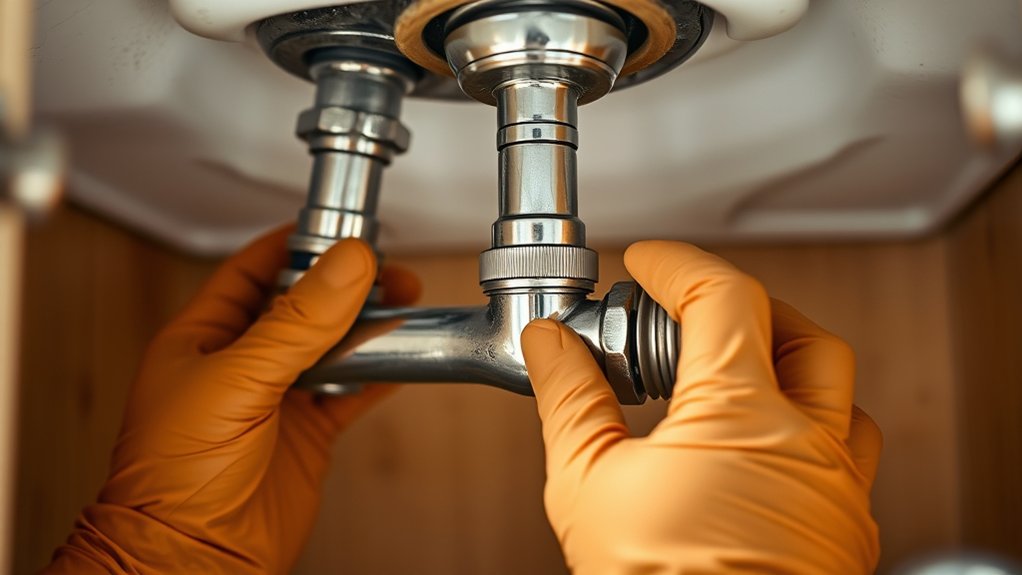
Once the water supply is securely turned off, you can start disconnecting the water lines from your old faucet. First, place a bucket or towel underneath to catch any residual water.
Use an adjustable wrench to carefully loosen the nuts connecting the water lines to the faucet. Don’t force the fittings, as this helps prevent damage or leaks later.
Keep in mind that local plumbing regulations may require certain procedures or materials during disconnection. Double-check compliance to avoid costly mistakes.
Also, take note of your faucet warranties before disconnecting. Some manufacturers require original parts to remain intact for warranty coverage, so avoid damaging components unnecessarily.
If you’re unsure, consult the warranty documentation or contact the manufacturer. By following these steps, you’ll ensure a safe disconnection while preserving the integrity of your plumbing and any warranty protections.
After this, you’ll be ready to move on to removing the old faucet itself.
Remove the Old Faucet From the Sink
Although disconnecting the water lines is essential, you’ll need to loosen the mounting nuts and remove any clips securing the old faucet to the sink before lifting it out. Use a basin wrench to reach tight spaces under the sink.
Pay attention to the faucet design, as some models have unique mounting systems that affect how you remove them. Also, keep manufacturer compatibility in mind, since some parts may be tricky to detach if they’re custom-fitted.
Here’s a quick visual to guide you:
| Step | Tool Needed | Note |
|---|---|---|
| Loosen mounting nuts | Basin wrench | Access from below the sink |
| Remove clips | Screwdriver | May vary by faucet design |
| Detach old faucet | Hands/gloves | Lift carefully to avoid damage |
| Check connections | Flashlight | Verify all parts are free |
Taking these steps will help you safely remove the old faucet, preparing you for the next stage.
Clean the Kitchen Sink Surface Before Installation
With the old faucet removed, your next step is to thoroughly clean the sink surface where the new faucet will sit. Proper surface preparation guarantees a secure fit and helps prevent leaks or damage over time. Use effective cleaning techniques to remove grime, old sealant, and mineral deposits.
Thoroughly clean the sink surface to ensure a secure faucet fit and prevent future leaks or damage.
Follow these steps for ideal surface preparation:
- Scrape off old putty or caulk gently with a plastic scraper to avoid scratching the sink.
- Wipe the area with a cloth soaked in a mild detergent solution to eliminate dirt and oils.
- Rinse thoroughly with clean water, then dry completely with a lint-free cloth. This prevents moisture from interfering with the new installation.
Position the New Faucet and Tighten Mounting Hardware
Now, position the new faucet so it lines up properly with the sink holes. Once it’s in place, tighten the mounting nuts underneath to secure it firmly. Hold the faucet steady as you tighten the nuts so it doesn’t shift out of alignment.
Align Faucet Correctly
Before securing the faucet, make sure it sits evenly over the sink holes and aligns with your countertop. Proper alignment ensures your faucet functions well and looks great with your kitchen’s style and faucet finishes.
Misalignment can affect water pressure or cause leaks. Follow these steps:
- Center the faucet base so all mounting holes are covered and the faucet is parallel to the countertop edge.
- Check that the faucet’s spout clears the sink bowl comfortably without hitting the backsplash or countertop.
- Verify that the faucet’s orientation complements the kitchen layout and allows easy access to controls.
Taking time to align the faucet correctly helps maintain consistent water pressure and prevents future adjustments or damage.
Secure Mounting Nuts
Once your faucet is properly aligned, the next step is to secure it firmly in place by tightening the mounting nuts underneath the sink. Start by positioning the mounting hardware so it sits flush against the sink’s underside.
Use your hand to tighten the nuts initially, ensuring the faucet doesn’t shift. Then, apply the correct tightening techniques, usually with a basin wrench or adjustable wrench, to snug the nuts further.
Be careful not to overtighten, as this can damage the sink or faucet. Tighten each nut evenly, alternating between them to maintain even pressure.
Double-check the faucet’s position before fully securing it. Properly tightened mounting hardware guarantees your faucet stays stable during use and prevents leaks or movement over time.
Connect Water Supply Lines to the New Faucet
Although the new faucet is securely in place, you still need to connect the water supply lines to ensure proper function. First, confirm the lines are compatible with your faucet to prevent leaks or damage. Using connectors designed for your faucet model is essential.
Next, attach the supply lines to the corresponding hot and cold water valves under the sink. Hand-tighten the connections, then use a wrench to give them a slight additional turn. Don’t overtighten, as this can damage the threads or cause leaks.
Finally, consider your home’s water pressure. If it’s too high, it may strain the faucet or supply lines over time. Installing a pressure regulator or checking the water pressure can help prolong your faucet’s lifespan and performance.
- Confirm faucet compatibility with the supply lines.
- Securely connect the hot and cold water lines.
- Assess and manage water pressure for durability.
Turn the Water Back On and Look for Leaks
Now that you’ve connected the water supply lines, slowly turn the water back on. Keep a close eye on the faucet and connections for leaks, and be sure to check under the sink, where leaks often appear first.
Restore Water Supply
How do you guarantee your new faucet works perfectly without any leaks? Restoring the water supply carefully guarantees your replacement is both functional and efficient. Follow these steps:
- Slowly turn the main water valve back on to prevent sudden pressure that might cause leaks.
- Check all connections and the faucet base for any drips or moisture. Even small leaks waste water and undermine water conservation efforts.
- If your faucet includes faucet aerators, ensure they’re properly installed. They reduce water flow without sacrificing pressure, promoting water conservation.
Inspect Faucet Connections
Once you turn the water back on, carefully inspect all faucet connections for leaks. Pay close attention to the connection types—whether compression, threaded, or quick-connect fittings—as each requires a slightly different tightening approach.
Faucet material can affect how you handle these connections. For example, brass fittings need gentle tightening to avoid damage, while stainless steel can handle a bit more torque.
Use a dry cloth or tissue around the joints to spot any dripping water immediately. If you notice any leaks, turn the water off and tighten the connections accordingly.
Don’t over-tighten, as this can damage the faucet material or strip threads. Confirming a leak-free seal now prevents water damage and ensures your new faucet operates smoothly.
Check Under-Sink Leaks
After confirming that the faucet connections are secure and leak-free, turn the water supply back on to inspect underneath the sink. Carefully check all joints and pipes for any signs of dripping or moisture.
Pay close attention to areas near pipe insulation. Damaged insulation can hide leaks and cause condensation issues.
Here’s what to do next:
- Look around under-sink storage for any wet spots or water damage.
- Run the faucet while watching for leaks at the supply lines and drain connections.
- Feel around pipe insulation to ensure it’s dry and intact.
Address any leaks immediately to prevent mold or structural damage. Properly maintaining pipe insulation and keeping under-sink storage organized helps you catch problems early and extends your plumbing’s life.
Test the Kitchen Faucet for Proper Operation
Before you finish up, turn the water supply back on and check the faucet carefully for leaks and proper water flow. Pay attention to the water flow; it should be smooth without sputtering or low pressure.
Turn the water back on and ensure the faucet flows smoothly without leaks or low pressure.
Test both hot and cold water to ensure each handle or lever functions correctly and switches temperature seamlessly.
Next, move the faucet spout through its full range of motion, especially if it swivels, to confirm it operates without resistance or unusual sounds.
Watch for any drips around the base or under the sink, as these could signal a loose connection. Also, check the aerator and spray functions, if included, to verify that water disperses evenly.
Troubleshoot Common Installation Issues
If you notice any leaks, unusual noises, or inconsistent water flow during your faucet test, don’t worry. These common installation issues have straightforward fixes. Prioritize installation safety by turning off the water supply before making adjustments. Also, keep your faucet warranty in mind; improper fixes might void it.
Here are three quick troubleshooting tips:
- Leaks: Check all connections and tighten any loose nuts. Use plumber’s tape on threaded joints to ensure a watertight seal.
- Noises: Air trapped in the pipes often causes noise. Run water at full flow for a minute to clear air pockets.
- Inconsistent water flow: Inspect the aerator for debris or mineral buildup. Clean or replace it if clogged.
Following these steps will help you resolve most problems while protecting your faucet warranty and maintaining installation safety.
Frequently Asked Questions
How Do I Choose the Right Faucet Style for My Kitchen?
You’ll want to pick a faucet style that matches your kitchen’s design and fits your sink’s configuration. Consider your water pressure to guarantee the faucet functions efficiently.
During faucet installation, check if you want a single or double handle, pull-out sprayer, or touchless option. Think about ease of use and maintenance too.
Matching style with functionality helps you enjoy both aesthetics and performance in your kitchen.
What Type of Faucet Finish Is Best for Durability?
You want a faucet finish so tough it could survive an apocalypse, right? For the best durability, go with stainless steel or brass finishes—they’re champions in faucet material.
These finishes offer incredible corrosion resistance, meaning they won’t rust or fade even after years of kitchen chaos. You’ll save yourself from constant repairs and keep your sink looking fresh no matter what you throw at it.
Can I Replace the Faucet Without Removing the Countertop?
Yes, you can replace the faucet without countertop removal, as long as the faucet compatibility matches your existing sink setup. Most faucets are designed to fit standard sink holes, so you won’t need to disturb the countertop.
Just make sure your new faucet aligns with the number of holes and spacing on your sink. Skipping countertop removal saves time and effort, but double-check measurements to avoid any installation issues.
How Often Should Kitchen Faucets Be Replaced?
You should consider replacing your kitchen faucet every 10-15 years, but if you notice frequent leaks or reduced water flow, it’s time sooner. Regular faucet installation updates can improve efficiency and style, while leak repair can extend its life temporarily. Don’t ignore drips because they waste water and can damage your sink area. Staying proactive with maintenance helps you avoid bigger plumbing issues and keeps your kitchen running smoothly.
Are There Water-Saving Faucet Options Available?
Absolutely, you’ll find fantastic water-saving faucet options that fit your needs perfectly. Eco-friendly options boasting water-efficient technologies help reduce waste without sacrificing performance.
You can choose faucets with aerators, flow restrictors, or motion sensors to conserve water effortlessly. By selecting smart, sustainable solutions, you’ll save money on bills and support the environment.
Conclusion
Replacing your kitchen sink faucet might seem tricky, but once you’ve done it, you’ll feel like a pro. Think of it like assembling a puzzle—each step fits perfectly when done right.
Just like one homeowner who cut their water bill by 15% after installing a new, efficient faucet, you’ll enjoy both savings and satisfaction. Follow these steps, and you’ll have a sleek, leak-free kitchen sink faucet replacement in no time!